One of the fundamental measurements related to brewing is the gravity of the beer you are making. The gravity or “specific gravity” of the wort will change during the brewing process as the yeast ferment the wort into beer.
Before the yeast start to produce alcohol, the gravity, or “Original Gravity” of the wort is mostly a measurement of the presence of sugar in the liquid. This number will give you an idea of the amount of fuel that the yeast have to work with in changing your wort into drinkable beer and make it alcoholic in the process. After the fermentation is complete, most of the sugars are used up and there is considerably more alcohol in the beer. At this stage, you can take a “Final Gravity” reading to determine the amount of work the yeast did and the amount of alcohol that they put into the beer by doing that work. Pretty cool!
Most of the time, the gravity measurements are taken using a floating hydrometer. This device is basically a glass tube that has some led in the bottom of it to make is sink. The hydrometer, when dropped into a sample, will sink to a point and stop. The line that the liquid hits on the scale on the side will give you your gravity reading. Generally you have to offset it based on the temperature of your sample but generally it is not that much.
So, now when you go to the corner store and see the 40oz bottle of Steel Reserve High Gravity Lager, you know what they are talking about. Basically, it is some cheap beer that has a lot of alcohol in it.
Cheers!
Friday, October 22, 2010
Friday, October 15, 2010
Word of the Week - Turbidity
According to the all-knowing Wikipedia, Turbidity is the cloudiness or haziness of a fluid caused by individual particles (suspended solids) that are generally invisible to the naked eye, similar to smoke in air and is considered a key test of water quality. Now that you know that, why should you care about Turbidity.
Well, Turbidity is a key to understanding the color measurement for your beer and why it is the color that it is. One way that beer color can be measured is by using a spectrophotometer to measure the absorbance of light at 430nm nanometers, as it passes through a sample. This method was established by the ASBC as a way of standardizing the color measurement process. At the time, it was measured against colored glass plates and was done manually which allowed for a degree of error. The 430nm of light bandwidth was selected at the time to create a set of results that were consistent with the Lovibond measurement that was used at the time. Thus, the Lovibond and the new Standard Reverence Model (SRM) were used interchangeably.
 Turbidity makes its appearance as the cause of less light to pass through the solution, thus creating darker wort and a higher Lovibond/SRM scale rating. This explains why you can actually filter color out of your beer if you use a fine enough filter medium.
There are other ways of measuring the color as well. Many brewing suppliers sell charts that brewers can use to compare beer samples to and get a rough reading of their SRM/Lovibond measurement. I have included a table from http://en.wikipedia.org/wiki/Standard_Reference_Method that can be used in the same way and also shows where various styles fall on the scale.
Hope you enjoyed the word of the week.
Cheers!
Well, Turbidity is a key to understanding the color measurement for your beer and why it is the color that it is. One way that beer color can be measured is by using a spectrophotometer to measure the absorbance of light at 430nm nanometers, as it passes through a sample. This method was established by the ASBC as a way of standardizing the color measurement process. At the time, it was measured against colored glass plates and was done manually which allowed for a degree of error. The 430nm of light bandwidth was selected at the time to create a set of results that were consistent with the Lovibond measurement that was used at the time. Thus, the Lovibond and the new Standard Reverence Model (SRM) were used interchangeably.

There are other ways of measuring the color as well. Many brewing suppliers sell charts that brewers can use to compare beer samples to and get a rough reading of their SRM/Lovibond measurement. I have included a table from http://en.wikipedia.org/wiki/Standard_Reference_Method that can be used in the same way and also shows where various styles fall on the scale.
Hope you enjoyed the word of the week.
Cheers!
Tuesday, October 12, 2010
Ultimate SBA Loan
As I was thumbing through the internet looking for news related to brewing I stumbled across this interesting article about a small brewery in Milwaukee that got a huge loan from the government. http://www.biztimes.com/manufacturingweekly/2010/10/11/
At first I thought it was not just a normal SBA loan and it was some sort of fancy sounding bank loan, but behold, it was indeed a Small Business Administration loan. And, for $1.4 million dollars no less!
Getting a loan of that size for a small business was not even something that I thought was possible before I read about the Lakefront Brewery’s success. I read that it is thanks to a new SBA program that President Obama put in place only several weeks ago. That is the fastest I think the government has ever worked, ever!
I guess they used most of the money to refinance existing debt but some of it was used to make a new reception room for brewery tours and install a new whirlpool for beer clarification. Its really nice to see that the SBA is doing big things for small businesses like Lakefront and I hope that when it comes time for me to get a loan for my brewery there will be programs like this to help me out too.
I have never had the opportunity to try Lakefront’s beer but I am going to do my best to find some here in Michigan.
Cheers!
Thursday, October 7, 2010
Carboy Drainer
Have you ever been washing out your carboys and stood there for about 10 minutes shaking excess water and foam out of them only to find more water in the bottom later after setting them down. I had this issue for a while. I would always have to drain my carboys about 2-3 times to make sure that all of the water was out of them and then hope that they would properly air dry without mold growing in them.
I eventually came across the Carboy Drainer online at a brewery supply site and though the name was not very inventive, I thought that I would give it a try.

It is basically a plastic collar that is sized for 6.5 gallon and 5 gallon carboys to fit into when inverted. There are small holes in the top where the glass meets the plastic and it sits slightly off of the ground so that there is proper airflow for the carboy while drying. The Drainer is also very sturdy so that you can leave a carboy out on the counter all night and not have to worry about cats knocking it down off of the counter and getting glass everywhere.
One of my favorite things about it is that I can wash and sanitize my carboys, leave them upside down in the drainer while I am doing other things and it drains out most all of the foam and water that was in the carboy.

I eventually came across the Carboy Drainer online at a brewery supply site and though the name was not very inventive, I thought that I would give it a try.

It is basically a plastic collar that is sized for 6.5 gallon and 5 gallon carboys to fit into when inverted. There are small holes in the top where the glass meets the plastic and it sits slightly off of the ground so that there is proper airflow for the carboy while drying. The Drainer is also very sturdy so that you can leave a carboy out on the counter all night and not have to worry about cats knocking it down off of the counter and getting glass everywhere.

I do recommend sanitizing the drainer before using it as with any other equipment you may be using. It is also a good idea to put some paper towel under the drainer so that it does not leak the water all over your counter.
Final thoughts: I got mine for about $7 and it is worth every penny. The construction is sturdy and durable and it does exactly what it was designed to do, assist in drying carboys. I highly recommend one of these and give it 5 stars for sure.
Cheers!
Sunday, October 3, 2010
Keg-o-rater
So, this project has been a long time coming… I started this last summer with the intentions of completing it then but, as most things go with me, I got delayed a bit. Any way, I wanted to get a Keg-o-rater for a while as I had been brewing beer and putting it in bottles but wanted to put it in kegs in stead. Beer seems to take up a lot more room in the fridge when it is in 16 oz bottles and you have 10 gallons of it in there. : )
After some initial searching on the internet for new keg-o-raters, I realized that the ones that were in my budget were too expensive for the quality of the machine that I was getting. This sent me on a quest for plans on building my own as I figured that I could make a better cooler for the same price as the cheaper ones on the internet.
I ended up settling on the plans at Mike Beer (http://www.mikebeer.net/chestfreezer.htm) and making a few modifications to them. Though, the idea is basically the same; Get a chest freezer, convert it into a keg-o-rater and make sure it can be converted back without any damage if needed in the future.

 Next, I took tons of measurements of the lid and the outside to make sure that my collar would fit just the way I wanted it to. One thing that I wanted was a collar that would extend low enough that I could mount a drip tray on it without damaging the freezer by drilling it into the side-wall. I also did not want to put it on the floor as the pets would be drinking out of it in no time. I hit Home Depot for all of the lumber and screws. I ended up getting 2x4s for the top part of the collar and some ¼ inch thick plywood sheeting for the wrap that went down the outer face of the freezer. Some nice 90 degree moldings were used to finish off the corners and give them a more polished look as well. I cut all of the wood and it all ended up fitting together more or less how I wanted it to. Again, bonus! After this point, I took the “small” hiatus on the project. It was not until the party that we are having this coming weekend that I realized that I should finish the project so people would not have to open the lid and use the cheap plastic taps every time they wanted beer.
 Off to the local homebrew store went the wife and I to get the pieces and about 30 minutes later we emerged with everything we needed and $210 poorer. We got a one-to-two splitter for the gas as I felt that I would not have three beers on tap regularly enough to require a third tap or a third beer line. That ended up working out nicely as there is more room in the freezer now for beer people bring over to parties as well as it makes taking kegs out and putting them in a little easier. That’s one of the cons of a chest freezer conversion is that you have to be able to lift the full kegs up and over the rim of the freezer unless you have a stepladder or something, which I do not.
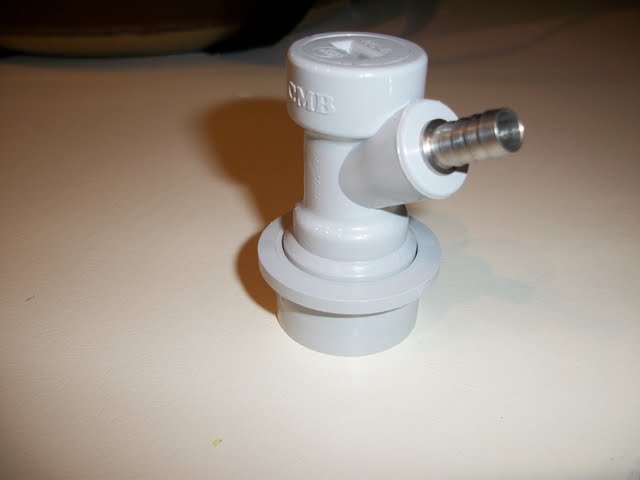
We also got two 5 inch shanks for the beer to travel through the collar and some nice stainless steel taps with little, generic handles. I will change the handles out with something cooler later but these work great for now and they were only a couple of bucks each. Thankfully, I already had a temperature control unit at the house so I did not have to get one. We finished up the order with 12 feet of beer line, 3 feet of gas line and some adapters for the kegs. I would have gotten less beer line but the guy at the store mentioned that I would want more line to ensure less foaming from the beer. I guess the length of line helps the beer to handle the pressure difference better and not foam up like if I had a short line going to the tap. Once again, beer store guys know their stuff.

It took me a couple of hours total to get everything sanitized and installed in the freezer the way I wanted it. I had to get a 7/8 inch drill bit at Home Depot for the hole that the shanks were going to use to go through the collar but that was it for the Home Depot. That’s pretty good for me as I usually have to go there at least three times for any project that I do, no matter how well I plan it out.


Overall, the project ended up costing about $400 and not only is it larger than the refrigerators you can get online, it holds colder, better temperatures longer, and I have the satisfaction of telling my family and friends that I made that, not just bought it. Project skill rating is about 2 out of 5. It mostly requires measuring skills and the ability to cut wood. If you don’t have tools to cut wood and a screwdriver of some sort, the project may be a little more expensive but not much.
 |
| Cheers! |

Subscribe to:
Comments (Atom)